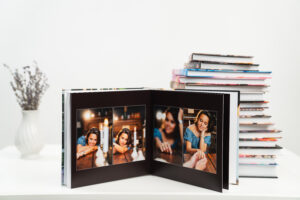
Photo books are a creative way of presenting your photos and images. For businesses, photo books are a stylish and professional way of presenting images of their products or a portfolio of their past projects. For everyday users, photo books are a much more durable alternative to your typical photo album that you can put on your coffee table or bookshelf.
While there are DIY solutions to create your own type of photo book, a professionally-made photo book offers you higher quality and craftsmanship. Here’s what you need to know about what goes into printing a photo book.
How to Print a Photo Book
Here are the steps that typically go into creating your photo book.
1. Find a Printer
You can find plenty of professional printers in your area or online. It’s always a good idea to shop around for potential printers to find the best prices for quality prints, packages, and the number of copies you need.
Consider the type of photo book you want to create, and then narrow down your options based on which printers offer more flexibility and better quality for the best prices. Some printers provide features like layout, templates, icons, photo editing, and cover design, while others are just limited to printing your images onto pages.
2. Choose Your Images
Next, choose the images you want to print and display in your photo book. Here are some tips to keep in mind when selecting:
Choose High-quality Images: Your photos should be at least 300 pixels per inch (PPI). These photos are considered high resolution and will result in sharp and crisp images. Anything less, and your images can come out a bit pixelated or blurry.
Don’t Clutter Your Album: You may have a wide selection of images to add to your photo book, but it’s not recommended that you include every single one. Your photo book should tell a story with your images, so showing multiple photos that essentially show the same thing is unnecessary. Instead, compare similar photos and choose the best one to put in your book.
Narrow It Down to the Most Important Shots: Whether you’re creating a photo book to create a keepsake for a special event or for your business, you don’t have to add every photo just for the sake of it. Viewers can get tired of seeing too much of the same thing, and they’re more likely to skim through your photobook if it looks too bulky to stop and appreciate your images.
For Businesses, Choose Photos That Match Your Brand: Professional product photography gets you quality images to display in your catalog. If you’re creating a lookbook for potential clients, your images should highlight the best features of your products and services.
3. Create Your Layout
Some printers offer to handle layouts through pre-made templates or by having someone create the layout for you. You can also opt to create the layout yourself using any design and layout software, such as:
- Adobe Creative Suite (Illustrator, InDesign, Photoshop)
- Microsoft Publisher
- QuarkXPress
- Any other image editing and layout software
4. Choose Your Paper Size and Type
Depending on your printer, your paper size may be limited to what the printer can provide. The most typical sizes for photo books include:
- Landscape: 12” x 9”
- Portrait: 8.5” x 11”
- Square: 8” x 8”
Paper type can also vary. A good option for photos is paper with a glossy finish. This adds a professional touch to your images and gives them a smoother finish to your images.
5. Choose the Binding Type
After printing your images into pages, they can now be sewn or glued into photo book pages. Photo books typically come in either a casewrap binding or casebound binding.
Casewrap books are printed on a commercial press and have a thin film laminate for protection. A printed sheet of paper is then adhered to the hardcover. This can then be laminated with different finishes to provide a more creative and eye-catching finish. Casewrap isn’t as durable as casebound binding, so make sure that your printer takes additional steps to ensure the durability of your book, like adding additional laminate for durability.
Casebound books, on the other hand, are a more traditional type of hardcover where cloth or leather are used in the book’s cover and spine. This provides an understated and classic look and is the more durable and long-lasting option for photo books.
How Much Does It Cost to Print a Photo Book?
The price of photo book printing can depend on many factors. This includes things like the following:
- The added features and services you get from your printer.
- Materials used to create your book.
- Fixed-price packages from printers.
- The number of photos printed.
- Additional pages.
- Labor costs.
- Layout and design.
- Additional costs for bulk book production.
Depending on your printer, softcover photo books can start as low as $15, while hardcover books can start at $30. High-quality printing and premium bookbinding materials are more likely to cost more, but you can expect durable and stunning professional results.
Create Your Photo Book with Advanced Print and Finishing
Want to add your photos to a professionally printed photo book? Advanced Print and Finishing offers custom solutions that produce outstanding quality. Get in touch with us today to get a quote on your photo book ideas.